Create Document Templates for Automated Proposals, Contracts & Reports
Transform data from meetings, CRM systems, and integrations into professional documents automatically. This guide shows you how to create document templates for proposals, statements of work, quotes, and contracts that can be populated with content from your connected data sources.
Perfect for creating:
- 📄 Proposals from discovery calls, opportunities, and project data
- 📋 Statements of Work (SOW) based on requirement discussions and business data
- 💰 Quotes & Estimates using meeting notes, specifications, and pricing information
- 📝 Project Contracts incorporating terms from calls and account details
- 🤝 Service Agreements with details from consultations and contact systems
- 📊 Reports & Summaries with action items, metrics, and data from your integrations
Transform conversations and CRM data into professional documents automatically - streamlining your workflow with intelligent document generation.
Congratulations on starting your first document template. In this guide, we will show you how to create your first document template and how to upload it to your TurboDocx account.
Video Tutorial
Step 1: Create New Document Template
Let's start with creating our first document template.
- Open up whatever application you will be using to create your document (Word, Google Drive, etc).
- Anything you would like to be a variable or an item that will change from document to document will be put between these
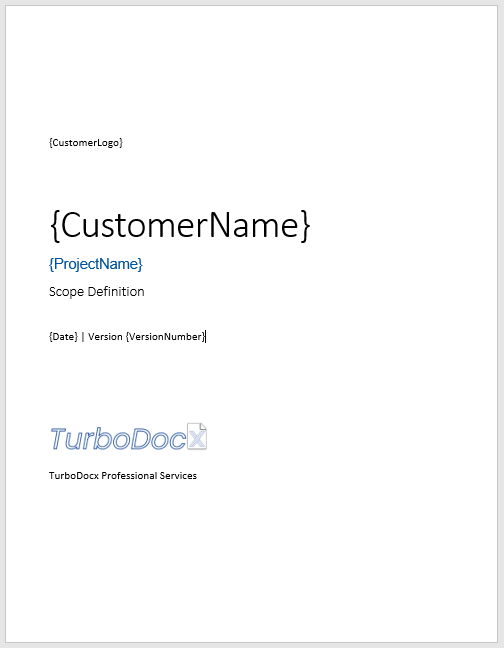
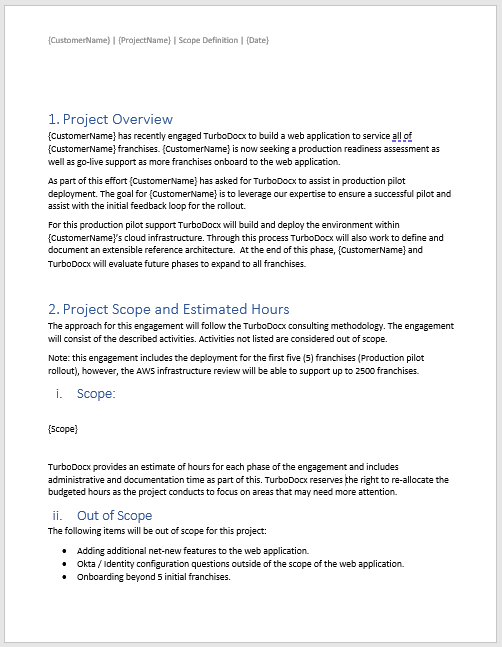
{brackets}. This can be single items such as{Date}or{CustomerName}or it can be whole sections such as{Scope}as seen in the images below.
- Once you've finished your document with the variables that you want please save it and move on to the next step.
-
If you've previously created a document you want to use as a template, go ahead and use that. Just remember to replace all the variables within the
{brackets}. Find and replace may be helpful here. -
All variables will need to be one word, so do not put any spaces in the middle of the
{brackets}. -
Remember your Knowledgebase, if the variable has the same name as something in your Knowledgebase TurboDocx will use the info from the Knowledgebase to fill in the corresponding Variable.
-
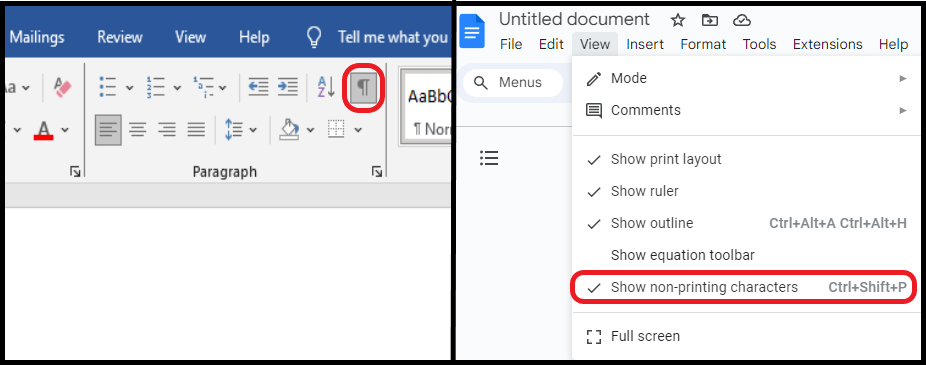
If you want to include an image or rich text, make sure the variable is on it's own line. Use the show paragraph tool if you need help. The location for that tool in Word and Google Docs are in the image below.
Step 2: Upload Template Document
Now that we've created our first template, let's upload it to TurboDocx.
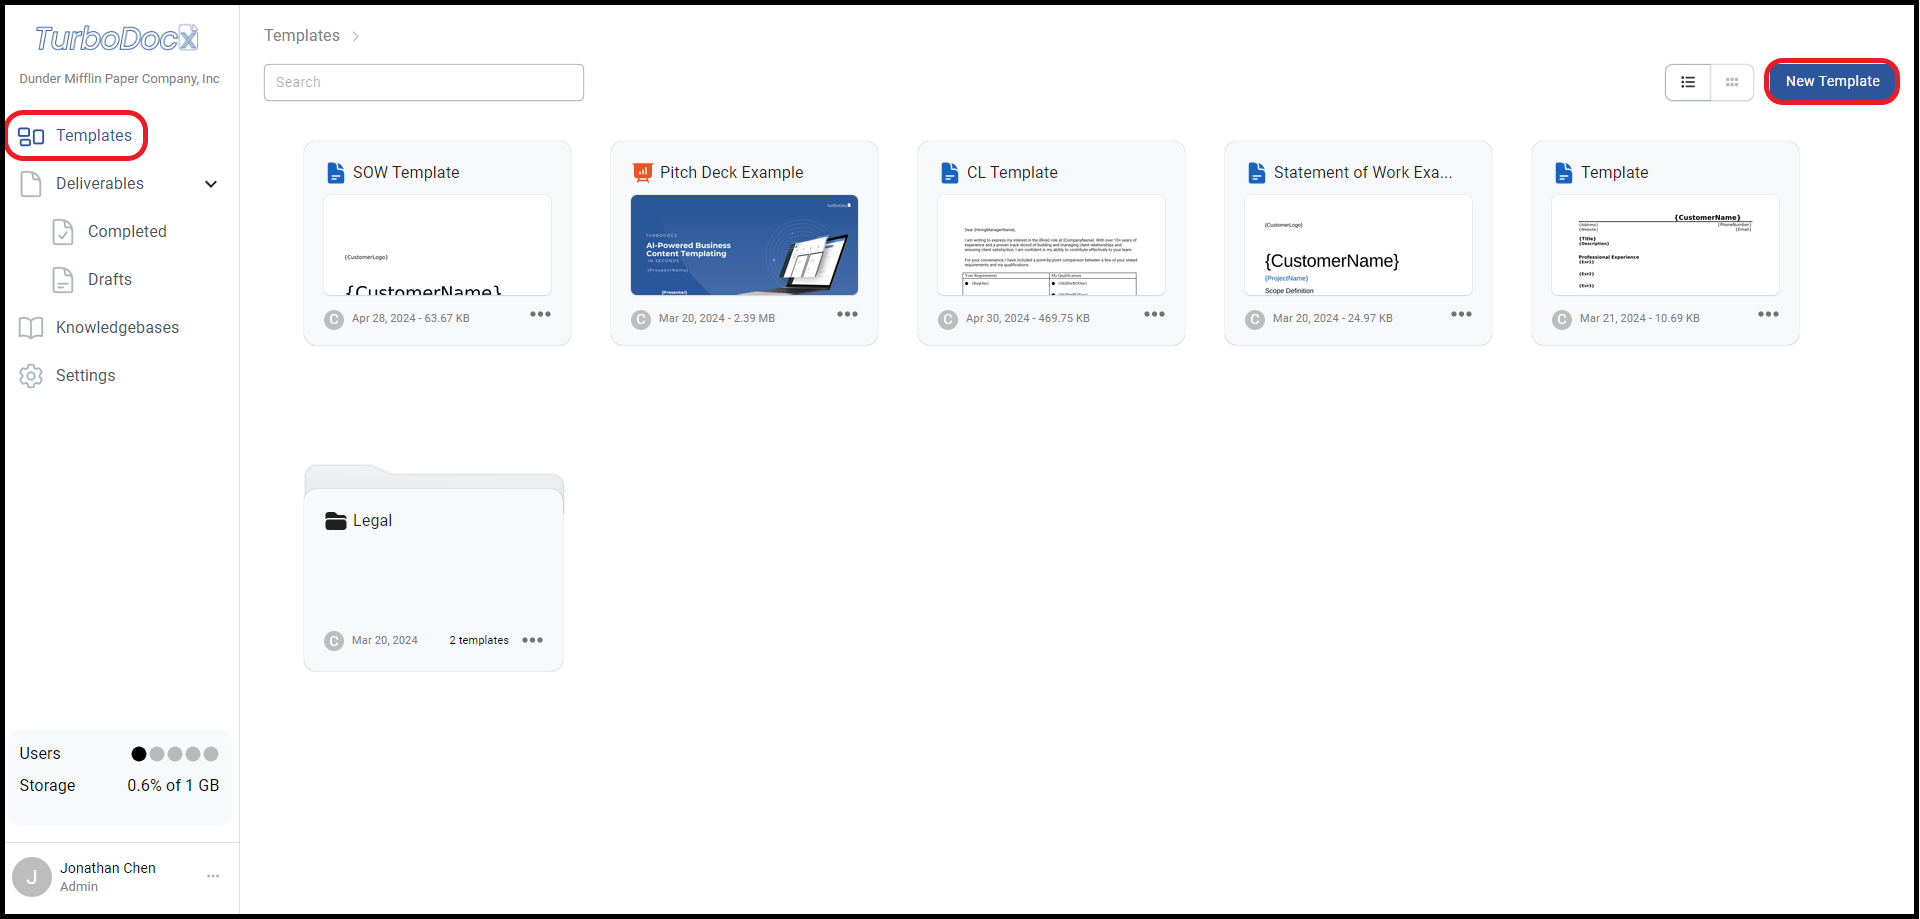
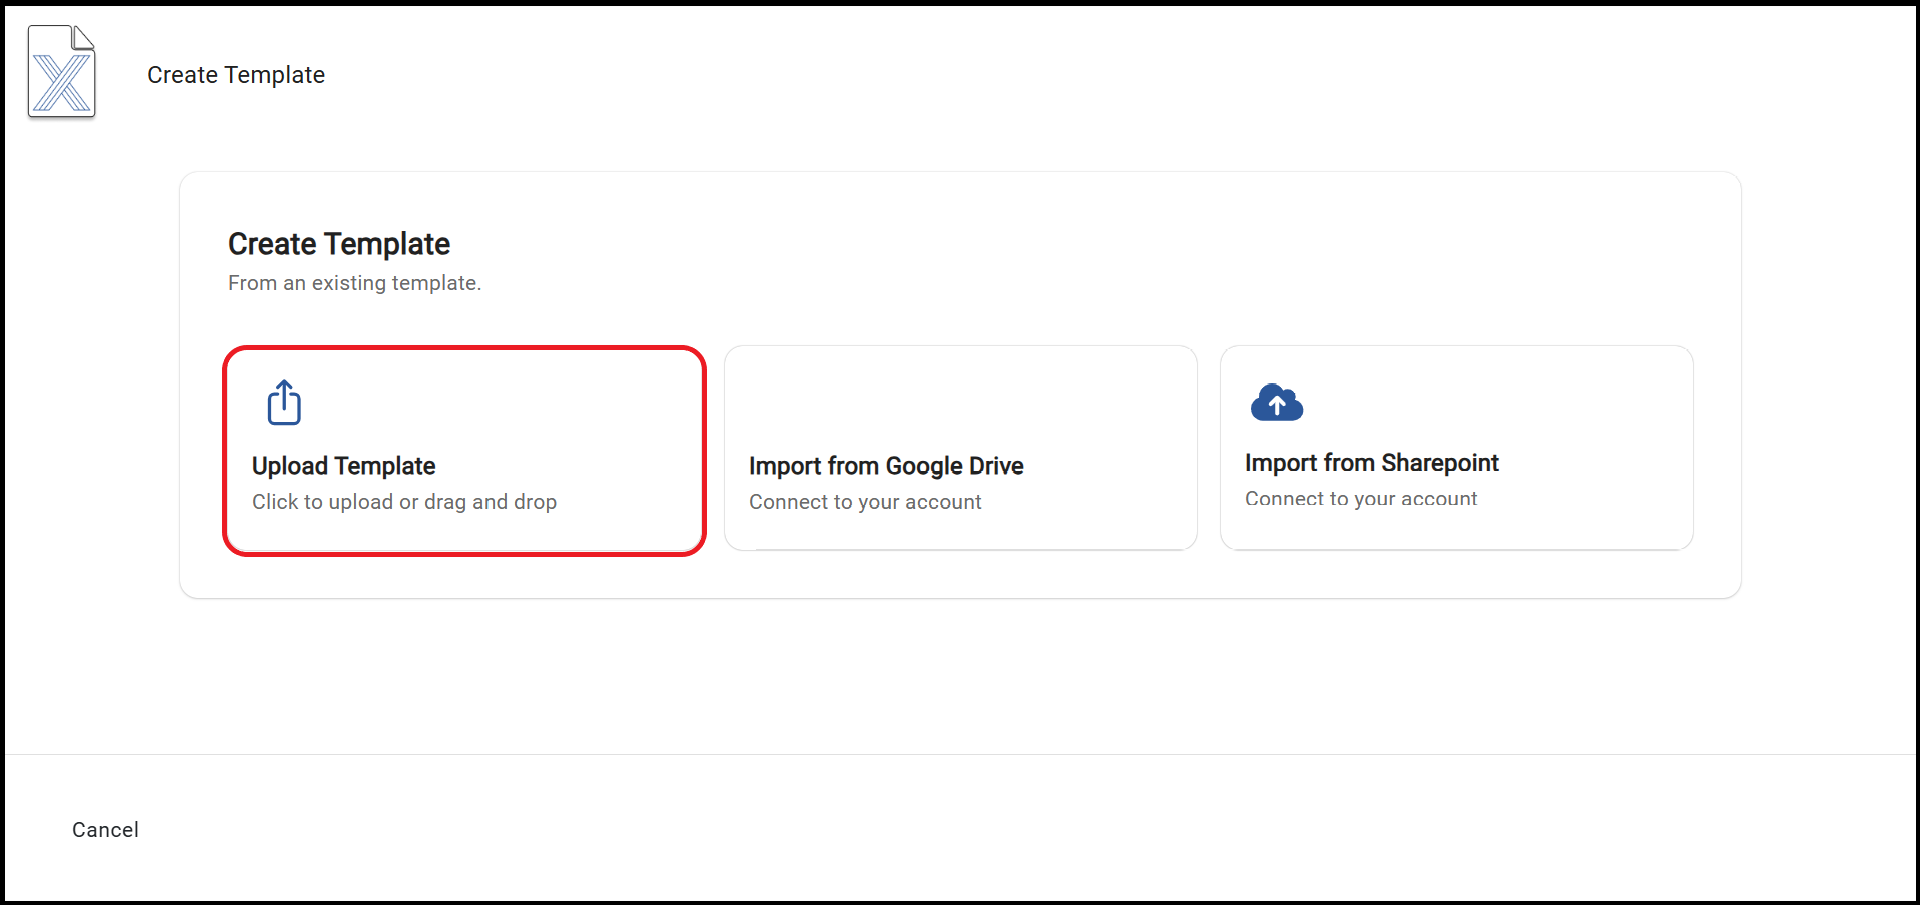
- Login to your TurboDocx account you should land on the Templates tab if not it can be found on the left side. Then, On the top right of your window, click on the "New Template" button.
- As you can see, there are multiple ways to upload a Document. For this example, we will click on the "Upload Template" area then choose the document you just saved in the last step or drag and drop your that document into the area.
Step 3: Preview Template
On the next screen, you will see a preview of your template.
- Check to make sure all the variables you wanted are listed under the variables column.
- (Optional) - On this page, you can also create default entries for your template that you can change later when you are creating the deliverable.
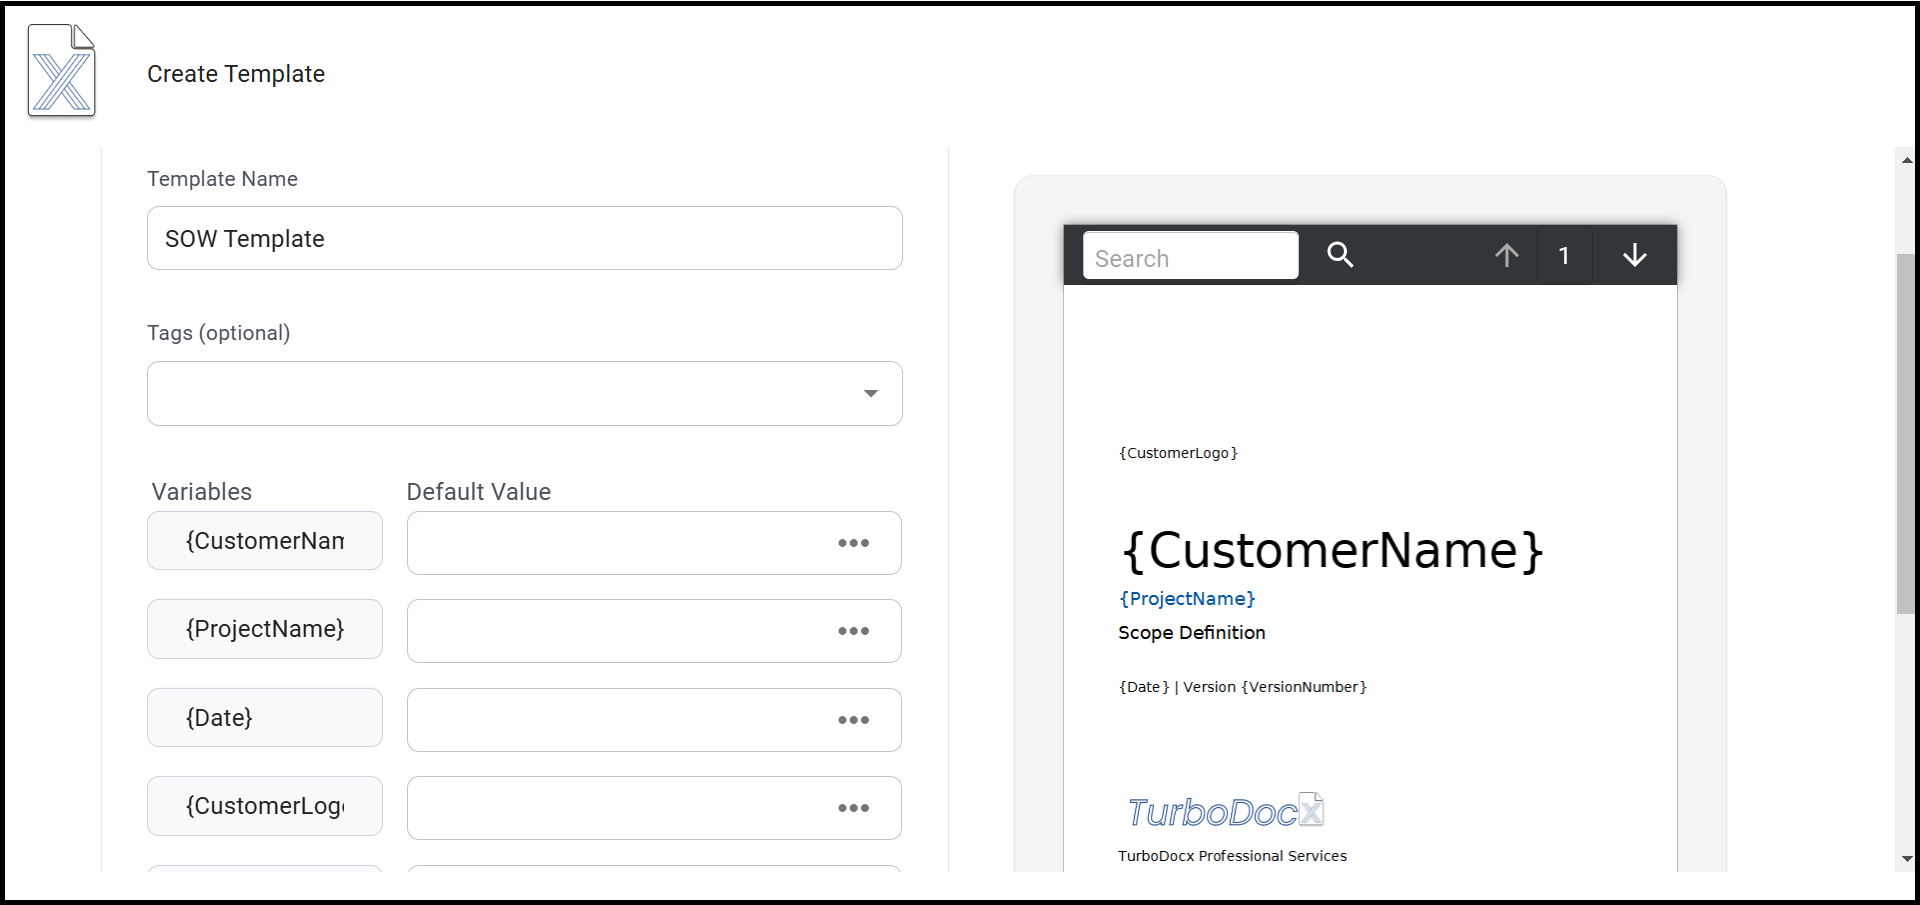
- Once you've checked to make sure all your variable are set, go ahead and click the "Create Template" button on the bottom right corner (you may need to scroll)
- Tags can be very useful to help find certain templates, and Knowledgebase entries. Don't forget to utilize them! You can also always come back and add them in the future.
- If your variables are not showing up, go back to step one and check if you're using the right brackets, and that there are no spaces in your variable name.
Finished
Congratulations on uploading your first document template. You should be able to see it on the template tab once you go back to the main page.